RECEIVE 10% OFF ON YOUR FIRST ORDER! – USE CODE: WELCOME10

[aelia_currency_selector_widget widget_type="dropdown_flags" currency_display_mode="show_currency_code"]

PINK OYSTER: Grow Kit Instructions

Beginner level mushroom to grow
Optimal growing conditions for pink oysters
Time to harvest lions mane

What is included in my Myterra Easy Grow Kit?

A full list of the contents is included in your grow kit, but let’s go over each item to make sure that you have everything you need to get growing.

  • Mushroom Substrate: This is an all-in-one mushroom grow kit which includes Myterra Labs Organic Rye Grain and Woodlovers fruiting substrate. The substrate is packaged in a white bag, which prevents your kit from losing moisture and degrading in UV light – this ensure that your mushroom substrate is perfectly hydrated whenever you are ready to grow. 
  • Liquid Culture Syringe: We’ve selected the best, easy-to-grow mushroom varieties. A liquid culture is simply mushroom mycelium that is grown in a nutrient-rich broth. Store your culture in the fridge if you don’t plan on using the kit straight away.
  • Sterilized Needle: For mushrooms to be cultivated to the best of their potential, there can be no competing organisms/contaminants (eg. bacteria, mold, fungi). We’ve included a pre-sterilized needle to inject your mushroom culture into your kit and ensure perfect mushroom growth.
  • Alcohol Wipe: Keeping everything clean is crucial for the success of your mushrooms. Alcohol is an effective disinfectant that will remove any unwanted contaminants from your bag and injection port.
  • Injection Port: This stick-on injection port can easily be attached to your grow kit. The injection port is self-healing, so once you’ve added your liquid culture into the kit, you will be able to grow without worrying about any contaminants affecting your mushrooms.
  • Humidity Bag: Mushrooms thrive in humid environments (70-85% RH) and this bag will help retain a humid environment around your kit. The humidity bag will only need to be used once your kit is ready to produce mushrooms (also known as fruiting).
  • Misting Bottle: Fill this bottle with clean water when your kit is ready to produce mushrooms and use it to mist the inside of the humidity bag. Do not spray the mushroom kit directly with water.
  • Clean area: Your kit does not require a sterile environment, but it does help to have a clean area when injecting the mushroom culture into the bag.
Pink Oyster Mushrooms Growing Easily Beginner

Step 1: Preparing to Grow

Are you ready to start growing your own beautiful bouquet of Pink Oyster mushrooms? Then let’s get started!


  • Preparing your liquid culture syringe: Work quickly during this step to minimize any unclean air from getting into your syringe. Remove the blue cap from liquid culture syringe and hold the syringe in one hand. Do not allow the tip of the syringe to touch anything – including your hands. Remove the sterile needle from its packaging by peeling one end apart. Twist the capped needle onto the tip of your syringe. Place the syringe on clean surface. You’ve completed the hardest part and can relax for a bit while you get everything else set up.
  • Remove packaging: Use scissors to carefully open the white kit bag. To avoid puncturing the clear inner bag, pull the top of the bag upwards and cut as close to the seal as possible.  

Step 2: Inoculation

Inoculation means to add a culture into a growing medium – in this case, you will be adding your liquid culture into the rye grains in the lower portion of your kit where the X is marked on the picture below. 

  • Disinfect kit: Wipe the front of the kit with the alcohol wipe where the X is marked in the picture above. This will disinfect the area where you will be placing your injection port. Hold onto the wipe, you’ll be using it again in just a moment.
  • Add injection port: Remove the backing on the injection port and stick the injection port in the area marked by an X in the image above. You’re aiming to have the injection port over the grains rather than the wood substrate.
  • Disinfect injection port: Wipe the injection port with the alcohol wipe. This will disinfect the port and prevent any unwanted contaminants from getting into your kit. Avoid touching the injection port, but if you do accidentally touch it, simply wipe the port again.
  • Inject: Remove the cap on the syringe needle by pulling it away from the syringe (Don’t twist it off). Push the needle through the injection port so that the tip of the needle is in the center of the grains. Slowly depress the syringe, moving the needle side-to-side while doing so. This will spread the mycelium among the grains, increasing the speed of your mushroom mycelium growth. Once the syringe is empty, recap the needle and safely dispose.

Not too sure how to complete this process? Watch the video below to see how we do it.

Step 3: Incubation

Patience is the hardest part of growing mushrooms. The excitement and anticipation will grow as you watch the white threads of mycelium growing through you kit.

For this stage of growth, you are aiming to get the mushroom mycelium growing through all the grains – don’t worry, the mushrooms will know which way to go to find the grains. Grains are packed full of nutrition and are the perfect food to start growing mushrooms on. Think of the grains as baby food and the hardwood substrate as adult food. Mushrooms will need as much nutrition as possible while they are establishing themselves before moving onto a different food source: wood. Below you can see the white mycelium starting to grow on the grains.

Keep the bag upright and follow these tips to get the best growth from your mushrooms:

  • Airflow: Pull the gussets of the bag outwards and adjust the bag so that the filter patch is not stuck to the back of the bag. This will encourage airflow within the bag and make it easier to shake the bag  once it is colonized.
  • Sunlight: Place your bag in an area that does not receive direct sunlight. The extra light and warmth can cause your kit to lose more moisture than it needs to. Mushrooms consist of about 90% water so it is crucial that your kit is perfectly hydrated in order to achieve a large harvest of mushrooms.
  • Temperature: Pink oyster mushrooms will grow well at room temperature or between 64-82F. Cooler temperatures will cause slower growth and warmer temperatures can dry out and kill your mushrooms.
  • Humidity: At this stage, you will not need to worry about humidity. The Myterra Labs Easy Mushroom Grow Kit contains the perfect amount of moisture to keep your mushrooms growing well.
  • Time: This stage will take 7-10 days or until about 90% of your grains have white mycelium on them. In the mushroom world, having mushroom mycelium grown through all of the grains would change the terminology from “grains” to “colonized grains”, and your colonized grains would be referred to as “grain spawn” if that was all that was in the bag.
  • Spot check: Check on your bag during this stage. You should only see white growth in your bag. If you see any unusual colors growing in the bag, there is a chance that the bag is growing more than just mushrooms. Don’t panic if this happens, we’re here to help. Send us an email with a picture of your kit and any questions to info@myterralabs.com. We’ll work together to figure out any issues until you are successfully growing mushrooms.
You will know that this step is complete when your bag looks like the photo below, or when the grains are 90% colonized.

Step 4: Shake it up!

When your grains are white/colonized, it is time to shake the bag. 
Your aim is to distribute the grains evenly through the hardwood substrate. 
  • Squish the grains gently to break them apart – mushroom mycelium will be rather thick between the grains, holding them together. Breaking up this congealed mass of grains and mycelium will help spread the grains among the hardwood.
  • Shake the bag up and down or hold the bag on its side and shake the bag – whichever method works best for you.
  • Avoid pulling off the injection port during this process. If you are worried that it will be pulled off, you can tape over the injection port to keep it in place.
  • Be gentle, but firm. Long/sharp fingernails can poke holes in the bag while you are shaking it, so be aware of what your hands are doing or simply wear gloves if you are worried about puncturing the bag.
  • Your bag should look like a nice blend of wood and grains at this point. Place the bag in an upright position and tap off any excess wood that may have stuck to the filter patch.
  • Gently press the top of the substrate down to lightly compress the wood/grain blend.
  • Place the bag back on the shelf and watch as each colonized grain sends mycelium into the wood. Leave it on the shelf for approximately 7-10 more days until the wood is colonized or until you start to see a pink tinge of color forming near the surface of your kit. See the image below.

Step 5: Fruiting

Fruiting is the phase of growth in which visible mushrooms begin to appear on your kit. Mushroom mycelium is triggered into the fruiting stage by two factors: full colonization of the growing medium (kit) and an increase in fresh air. This is why your kit needs to be fully colonized before starting the fruiting process.

When growing mushrooms, you can direct where you want the mushrooms (or fruits) to form and here’s how:

  • Stick the Fruiting Patch over your filter. Ensure that there are absolutely no gaps between the filter patch and sticker – mushrooms will find these air gaps and grow towards and out of them. If this happens, you will still get mushrooms, but most of the energy that the mushroom mycelium has will be used in an attempt to reach towards fresh air instead of producing mushrooms, resulting in smaller mushrooms.
  • Cut the bag: Using a clean knife or scissors, cut a two inch wide “X” into the side of the kit. The placement of the cut isn’t too important, but the cut does need to be made on an area where there is substrate behind the plastic. You will want it at least 2 inches above the bottom of the bag to avoid having your mushrooms growing into your shelf. If there are any areas where you can already see mushrooms forming on the sides of the bag, make the cut over this area. Do not make a cut into the air pocket above the substrate.
  • Breathe. It is very difficult to “mess up” this part of the fruiting process. It’s perfectly fine to cut into the hardwood substrate. All you are doing during this stage is providing a single spot where fresh air is coming into contact with the mushroom mycelium. This will trigger the mycelium to produce mushrooms and nature will take care of the rest.
  • Humidity: Your mushrooms are going to want a good environment to grow in. It is important to keep the humidity fairly high during the fruiting stage. Mist the inside of your humidity bag using the misting bottle. Place the moistened humidity bag, upside-down, over your kit. This will create a nice humid environment between your kit and the humidity bag – exactly where your new mushroom is going to form. If you have a fruiting tent, you can place the cut kit into your fruiting tent without needing the humidity bag.
Mist the inside of the humidity bag when it looks dry or twice a day. Do not spray the cut area of the mushroom bag – this will result in squishy mushrooms that may die before you are able to harvest them.
 
Over the next week, you will start to see small pink blobs forming in the cut are of your kit. These little blobs are tiny mushrooms and are called “pins”. Each of these pins will grow and develop into a larger mushroom.
Pink Oyster mushroom pins forming

As the pins grow, you will be able to differentiate between the cap/pileus of the mushroom and the stem/stipe of the mushroom. If the stems look very long and the caps don’t grow at the same speed or faster than the stem, your mushrooms need more fresh air. Cut slits into the humidity bag to allow small amounts of fresh air into the humidity bag.

Step 6: Harvesting

Knowing when to harvest your mushrooms is a quick skill to learn. It is very tempting to let your mushrooms grow for longer than they should. We are big advocates for experimentation so if this is your first time growing and you simply want to see how big they can grow then by all means have some fun and try it out. Mushrooms will also produce a prolific amount of spores if they are left to grow for too long. People who are sensitive to spores or have respiratory conditions are at risk of irritation to their respiratory pathways while the mushroom is producing spores.

If you want to harvest your mushrooms at their prime for cooking and before they release their spores then follow the steps below. 

  • Look at the caps: As pink oyster mushrooms grow, their caps will slowly unroll from the stem outwards. As the caps unfurl, the shape of the cap will change from a convex shape to a concave shape. This change in shape exposes more of the gills to the air, readying the mushroom for spore release. Once the cap is completely unfurled, the mushroom will release spores into the air. You will want to harvest the mushroom before the cap completely uncurls.
  • Smell: As the mushroom ages, the smell will change and develop into a more pungent ammonia-like smell. Harvest the mushrooms before the smell intensifies.
When the edges of your mushrooms look like the images below, you are ready to harvest. Gently grab the base of the mushroom and twist the mushroom while pulling it away from the kit. Pink oysters can have very firm stem bases, connecting to the substrate, and the firmness of the stem can sometimes be indicative of its age. If the stem is very firm, you can use a knife to cut through the base of the mushroom cluster, close to the substrate. 
Pink oyster mushroom close up

Can I get more harvests from my kit?

Once you’ve harvested your mushrooms, you’ll be able to get a second harvest or “flush” of mushrooms. Mushrooms can continue to grow as long as they have all of the requirements for growth such as: water and nutrition. The Myterra Labs Easy Mushroom Grow Kit has more than enough of both to sustain your mushrooms for a second round of mushrooms to form. Here’s what you need to do:

  • Tape over the hole that you cut in the kit. You want to avoid leaving any air gaps between the bag and the tape. If there is a gap between the tape and the bag, the mushrooms will find it and your next harvest will be a lot smaller and you will have a tiny mushroom form in the gap.
  • On the opposite side of the bag, cut another X into the bag.
  • Mist the inside of the humidity bag and place it over the kit.

 It’s as simple as that. Wait for 1-2 weeks to see fully mature  mushrooms before harvesting.

Cooking and Storing Your Mushrooms

Pink Oyster chopping Block

Well done! You’ve successfully grown your own mushrooms. The options for what to do next are endless. 

Cooking: There are numerous ways to cook pink oyster mushrooms with an abundant number of recipes online. One of the most popular uses for oyster mushroom is as a vegan bacon substitute. Click Here to make oyster bacon.

Long term storage: If you grow multiple kits at once or if you’re going away for a week, you can dry your harvested mushrooms by slicing the mushrooms into strips. Mushrooms can be dried whole, but they take longer to dry. Airdry at 115F for 24-28 hours or until they are dry enough to snap apart. Store in an air-tight container for up to 6 months.

Related Posts/Products

Why Should You Grow Pink Oyster?

Learn how to grow Pink Oyster mushrooms using the Myterra Labs Easy Mushroom Grow Kit
Read More

What's next!

You are officially part of the mushroom growing community! Share your success on social media and follow us for more mushroom growing tips and tricks – there are so many mushrooms that you can test your new growing skills  on!

If you liked growing pink oyster mushrooms and want to expand your mushroom growing skills, we suggest growing White Oyster mushrooms. Click here to learn more. White oyster mushrooms are pearlescent and elegant with soft flesh. Although the pink and white oysters are both oyster mushrooms, their flavors and textures are very different. Our white oyster strain produces large clusters of mushrooms, providing a larger harvest than the pink oyster. The white oyster mushroom is easier to grow than the pink oysters because white oysters can tolerate a larger range of environmental conditions.

You might also enjoy

How to grow shiitake mushrooms using a grow kit

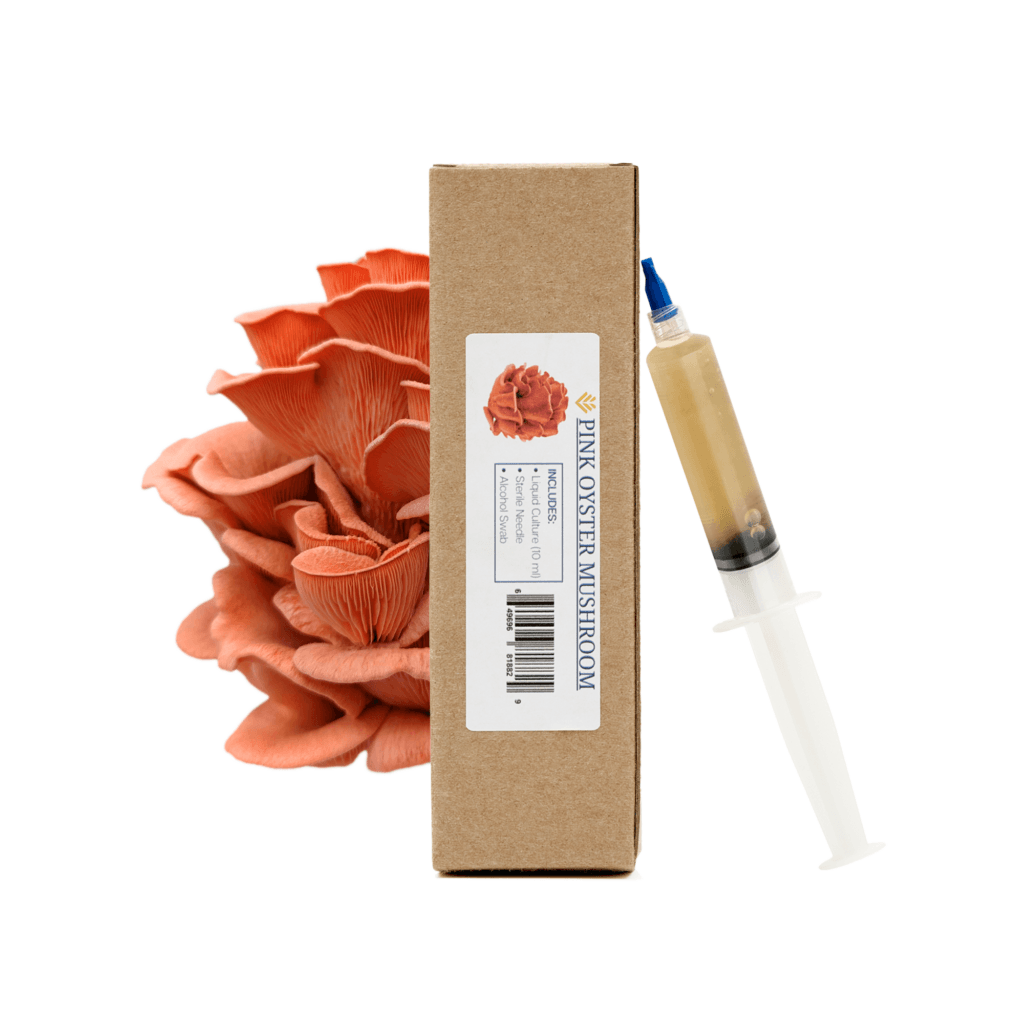
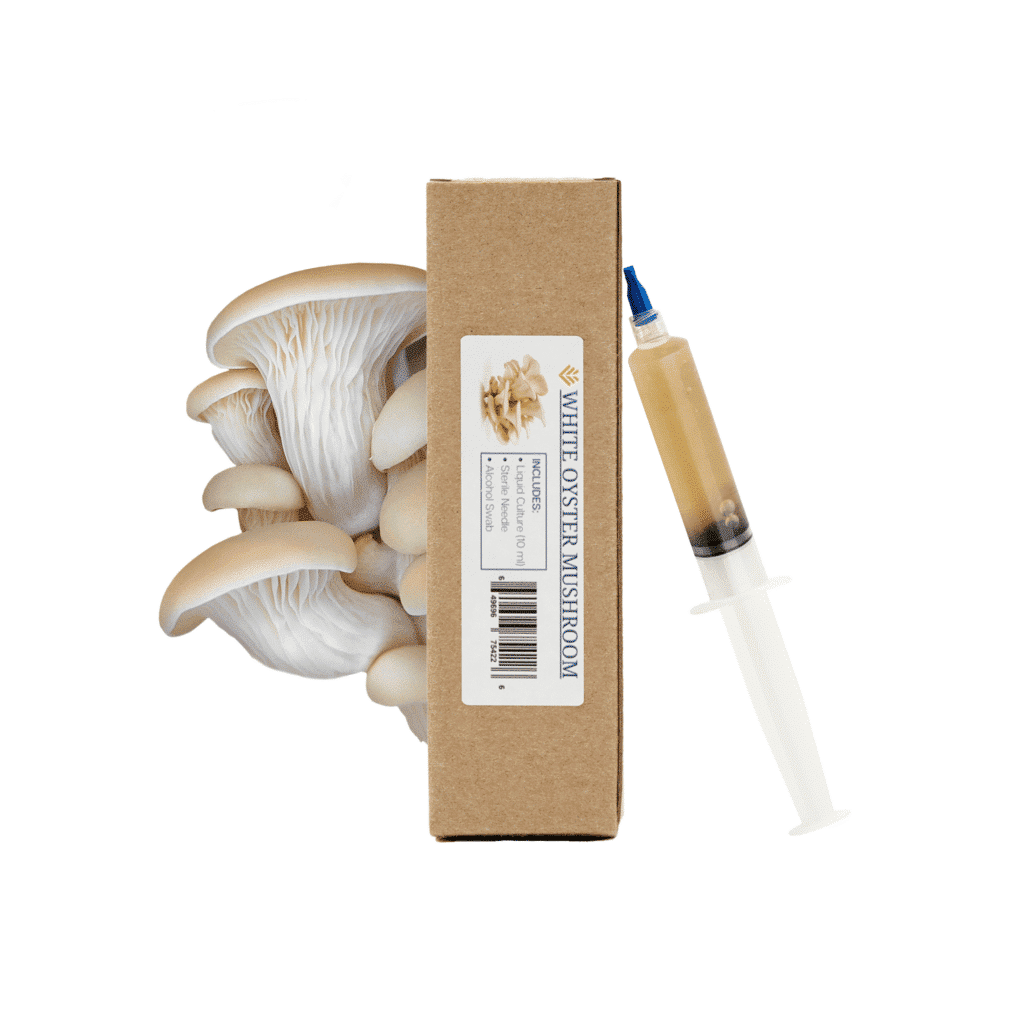
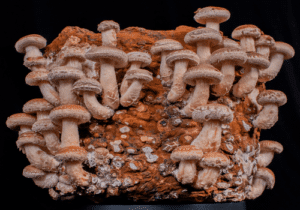
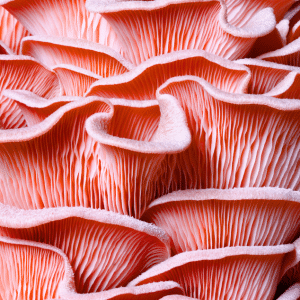
SHIITAKE: Grow Kit Instructions

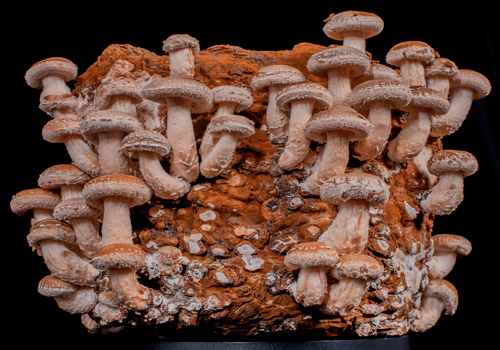
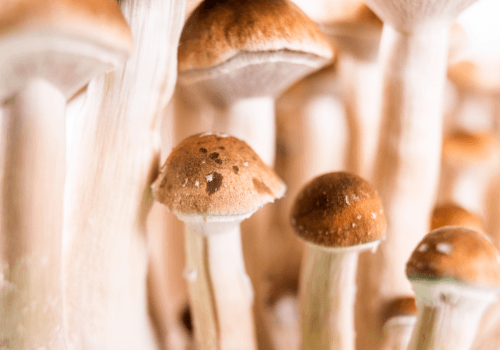
Learn how to grow Shiitake mushrooms using the Myterra Labs Easy Mushroom Grow Kit
Read More
What substrate should I use to grow mushrooms

Substrate Compatibility Guide

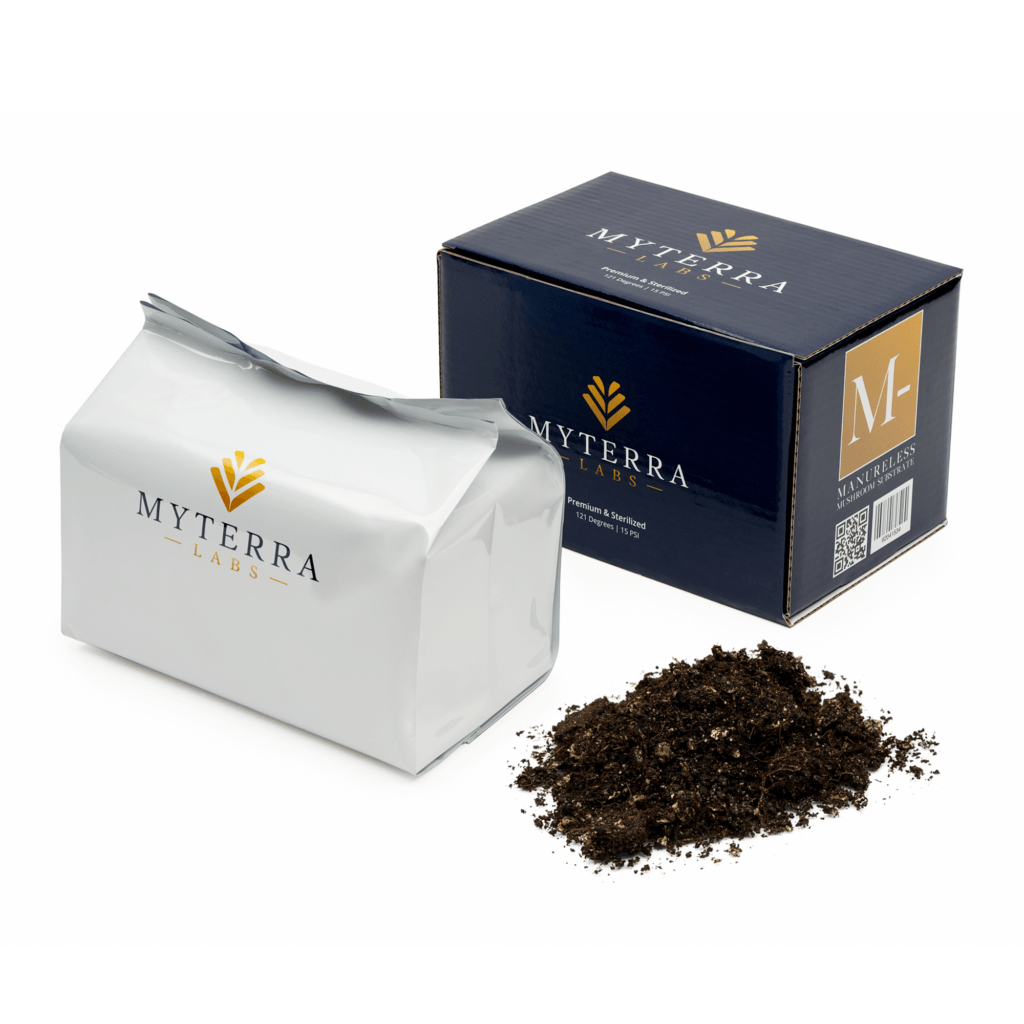
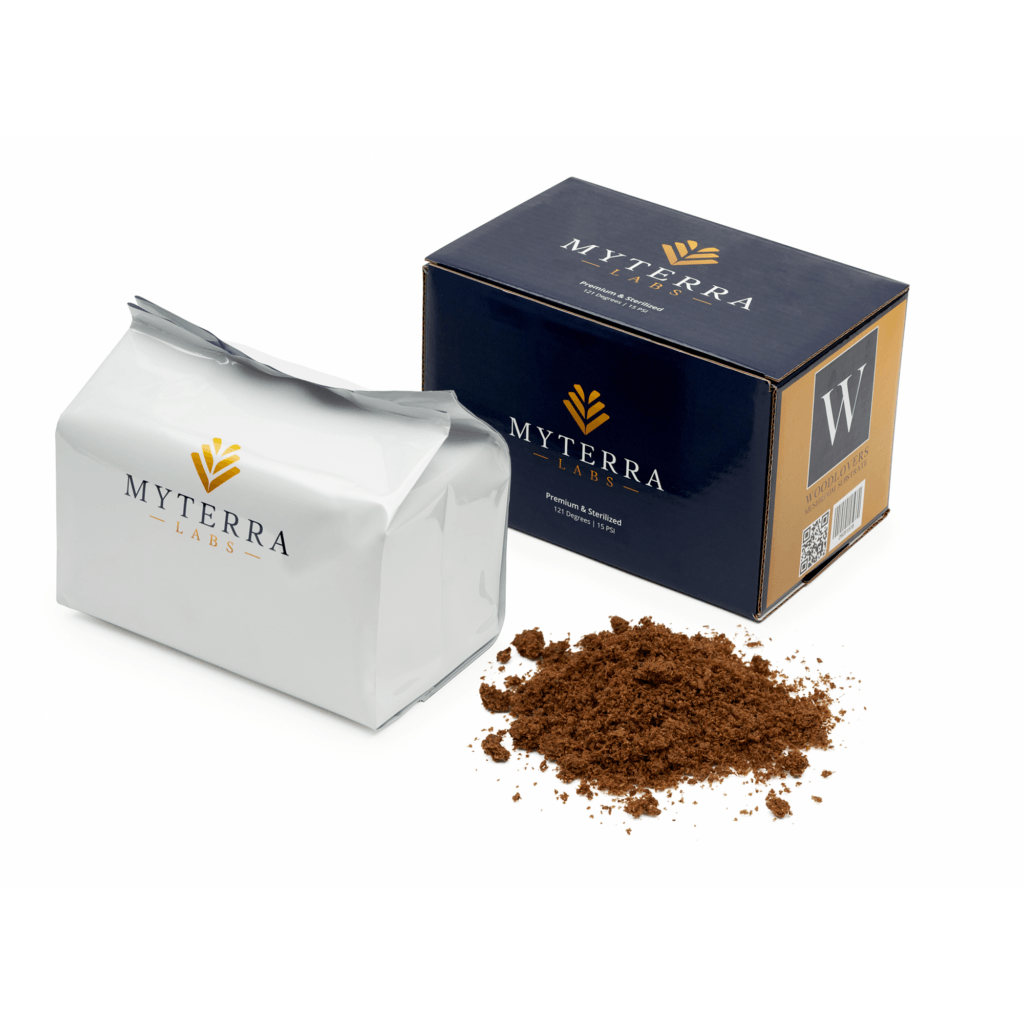
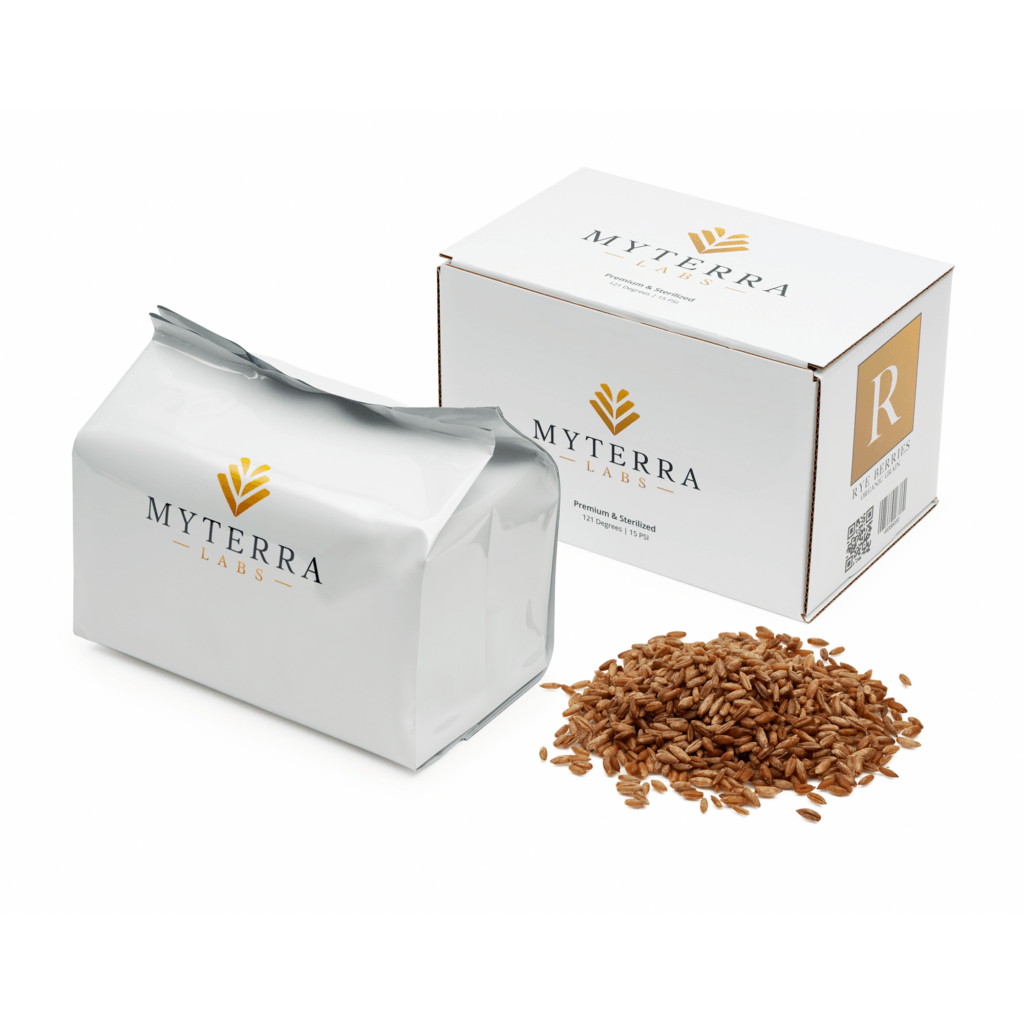
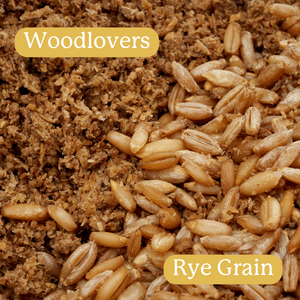
Selecting the right substrate is a key element in successful mushroom cultivation. Our Substrate Compatibility Guide is your go-to resource for understanding which substrate works ...
Read More
PS1 Grow kit

PS1: Grow Kit Instructions

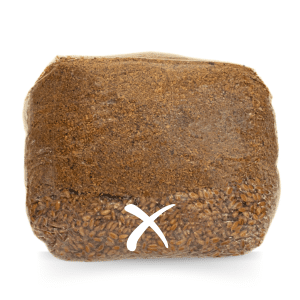
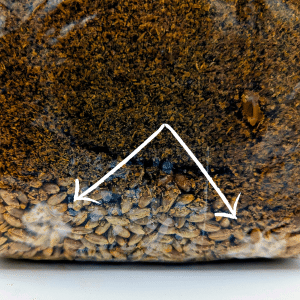
Welcome to the enchanting realm of our All-in-one Grow Kit, where you're about to embark on a mesmerizing journey into the world of naturally occurring ...
Read More

Featured products

Beginner level mushroom to grow
Optimal growing conditions for pink oysters
Time to harvest lions mane

What is included in my Myterra Easy Grow Kit?

A full list of the contents is included in your grow kit, but let’s go over each item to make sure that you have everything you need to get growing.

  • Mushroom Substrate: This is an all-in-one mushroom grow kit which includes Myterra Labs Organic Rye Grain and Woodlovers fruiting substrate. The substrate is packaged in a white bag, which prevents your kit from losing moisture and degrading in UV light – this ensure that your mushroom substrate is perfectly hydrated whenever you are ready to grow. 
  • Liquid Culture Syringe: We’ve selected the best, easy-to-grow mushroom varieties. A liquid culture is simply mushroom mycelium that is grown in a nutrient-rich broth. Store your culture in the fridge if you don’t plan on using the kit straight away.
  • Sterilized Needle: For mushrooms to be cultivated to the best of their potential, there can be no competing organisms/contaminants (eg. bacteria, mold, fungi). We’ve included a pre-sterilized needle to inject your mushroom culture into your kit and ensure perfect mushroom growth.
  • Alcohol Wipe: Keeping everything clean is crucial for the success of your mushrooms. Alcohol is an effective disinfectant that will remove any unwanted contaminants from your bag and injection port.
  • Injection Port: This stick-on injection port can easily be attached to your grow kit. The injection port is self-healing, so once you’ve added your liquid culture into the kit, you will be able to grow without worrying about any contaminants affecting your mushrooms.
  • Humidity Bag: Mushrooms thrive in humid environments (70-85% RH) and this bag will help retain a humid environment around your kit. The humidity bag will only need to be used once your kit is ready to produce mushrooms (also known as fruiting).
  • Misting Bottle: Fill this bottle with clean water when your kit is ready to produce mushrooms and use it to mist the inside of the humidity bag. Do not spray the mushroom kit directly with water.
  • Clean area: Your kit does not require a sterile environment, but it does help to have a clean area when injecting the mushroom culture into the bag.
Pink Oyster Mushrooms Growing Easily Beginner

Step 1: Preparing to Grow

Are you ready to start growing your own beautiful bouquet of Pink Oyster mushrooms? Then let’s get started!


  • Preparing your liquid culture syringe: Work quickly during this step to minimize any unclean air from getting into your syringe. Remove the blue cap from liquid culture syringe and hold the syringe in one hand. Do not allow the tip of the syringe to touch anything – including your hands. Remove the sterile needle from its packaging by peeling one end apart. Twist the capped needle onto the tip of your syringe. Place the syringe on clean surface. You’ve completed the hardest part and can relax for a bit while you get everything else set up.
  • Remove packaging: Use scissors to carefully open the white kit bag. To avoid puncturing the clear inner bag, pull the top of the bag upwards and cut as close to the seal as possible.  

Step 2: Inoculation

Inoculation means to add a culture into a growing medium – in this case, you will be adding your liquid culture into the rye grains in the lower portion of your kit where the X is marked on the picture below. 

  • Disinfect kit: Wipe the front of the kit with the alcohol wipe where the X is marked in the picture above. This will disinfect the area where you will be placing your injection port. Hold onto the wipe, you’ll be using it again in just a moment.
  • Add injection port: Remove the backing on the injection port and stick the injection port in the area marked by an X in the image above. You’re aiming to have the injection port over the grains rather than the wood substrate.
  • Disinfect injection port: Wipe the injection port with the alcohol wipe. This will disinfect the port and prevent any unwanted contaminants from getting into your kit. Avoid touching the injection port, but if you do accidentally touch it, simply wipe the port again.
  • Inject: Remove the cap on the syringe needle by pulling it away from the syringe (Don’t twist it off). Push the needle through the injection port so that the tip of the needle is in the center of the grains. Slowly depress the syringe, moving the needle side-to-side while doing so. This will spread the mycelium among the grains, increasing the speed of your mushroom mycelium growth. Once the syringe is empty, recap the needle and safely dispose.

Not too sure how to complete this process? Watch the video below to see how we do it.

Step 3: Incubation

Patience is the hardest part of growing mushrooms. The excitement and anticipation will grow as you watch the white threads of mycelium growing through you kit.

For this stage of growth, you are aiming to get the mushroom mycelium growing through all the grains – don’t worry, the mushrooms will know which way to go to find the grains. Grains are packed full of nutrition and are the perfect food to start growing mushrooms on. Think of the grains as baby food and the hardwood substrate as adult food. Mushrooms will need as much nutrition as possible while they are establishing themselves before moving onto a different food source: wood. Below you can see the white mycelium starting to grow on the grains.

Keep the bag upright and follow these tips to get the best growth from your mushrooms:

  • Airflow: Pull the gussets of the bag outwards and adjust the bag so that the filter patch is not stuck to the back of the bag. This will encourage airflow within the bag and make it easier to shake the bag  once it is colonized.
  • Sunlight: Place your bag in an area that does not receive direct sunlight. The extra light and warmth can cause your kit to lose more moisture than it needs to. Mushrooms consist of about 90% water so it is crucial that your kit is perfectly hydrated in order to achieve a large harvest of mushrooms.
  • Temperature: Pink oyster mushrooms will grow well at room temperature or between 64-82F. Cooler temperatures will cause slower growth and warmer temperatures can dry out and kill your mushrooms.
  • Humidity: At this stage, you will not need to worry about humidity. The Myterra Labs Easy Mushroom Grow Kit contains the perfect amount of moisture to keep your mushrooms growing well.
  • Time: This stage will take 7-10 days or until about 90% of your grains have white mycelium on them. In the mushroom world, having mushroom mycelium grown through all of the grains would change the terminology from “grains” to “colonized grains”, and your colonized grains would be referred to as “grain spawn” if that was all that was in the bag.
  • Spot check: Check on your bag during this stage. You should only see white growth in your bag. If you see any unusual colors growing in the bag, there is a chance that the bag is growing more than just mushrooms. Don’t panic if this happens, we’re here to help. Send us an email with a picture of your kit and any questions to info@myterralabs.com. We’ll work together to figure out any issues until you are successfully growing mushrooms.
You will know that this step is complete when your bag looks like the photo below, or when the grains are 90% colonized.

Step 4: Shake it up!

When your grains are white/colonized, it is time to shake the bag. 
Your aim is to distribute the grains evenly through the hardwood substrate. 
  • Squish the grains gently to break them apart – mushroom mycelium will be rather thick between the grains, holding them together. Breaking up this congealed mass of grains and mycelium will help spread the grains among the hardwood.
  • Shake the bag up and down or hold the bag on its side and shake the bag – whichever method works best for you.
  • Avoid pulling off the injection port during this process. If you are worried that it will be pulled off, you can tape over the injection port to keep it in place.
  • Be gentle, but firm. Long/sharp fingernails can poke holes in the bag while you are shaking it, so be aware of what your hands are doing or simply wear gloves if you are worried about puncturing the bag.
  • Your bag should look like a nice blend of wood and grains at this point. Place the bag in an upright position and tap off any excess wood that may have stuck to the filter patch.
  • Gently press the top of the substrate down to lightly compress the wood/grain blend.
  • Place the bag back on the shelf and watch as each colonized grain sends mycelium into the wood. Leave it on the shelf for approximately 7-10 more days until the wood is colonized or until you start to see a pink tinge of color forming near the surface of your kit. See the image below.

Step 5: Fruiting

Fruiting is the phase of growth in which visible mushrooms begin to appear on your kit. Mushroom mycelium is triggered into the fruiting stage by two factors: full colonization of the growing medium (kit) and an increase in fresh air. This is why your kit needs to be fully colonized before starting the fruiting process.

When growing mushrooms, you can direct where you want the mushrooms (or fruits) to form and here’s how:

  • Stick the Fruiting Patch over your filter. Ensure that there are absolutely no gaps between the filter patch and sticker – mushrooms will find these air gaps and grow towards and out of them. If this happens, you will still get mushrooms, but most of the energy that the mushroom mycelium has will be used in an attempt to reach towards fresh air instead of producing mushrooms, resulting in smaller mushrooms.
  • Cut the bag: Using a clean knife or scissors, cut a two inch wide “X” into the side of the kit. The placement of the cut isn’t too important, but the cut does need to be made on an area where there is substrate behind the plastic. You will want it at least 2 inches above the bottom of the bag to avoid having your mushrooms growing into your shelf. If there are any areas where you can already see mushrooms forming on the sides of the bag, make the cut over this area. Do not make a cut into the air pocket above the substrate.
  • Breathe. It is very difficult to “mess up” this part of the fruiting process. It’s perfectly fine to cut into the hardwood substrate. All you are doing during this stage is providing a single spot where fresh air is coming into contact with the mushroom mycelium. This will trigger the mycelium to produce mushrooms and nature will take care of the rest.
  • Humidity: Your mushrooms are going to want a good environment to grow in. It is important to keep the humidity fairly high during the fruiting stage. Mist the inside of your humidity bag using the misting bottle. Place the moistened humidity bag, upside-down, over your kit. This will create a nice humid environment between your kit and the humidity bag – exactly where your new mushroom is going to form. If you have a fruiting tent, you can place the cut kit into your fruiting tent without needing the humidity bag.
Mist the inside of the humidity bag when it looks dry or twice a day. Do not spray the cut area of the mushroom bag – this will result in squishy mushrooms that may die before you are able to harvest them.
 
Over the next week, you will start to see small pink blobs forming in the cut are of your kit. These little blobs are tiny mushrooms and are called “pins”. Each of these pins will grow and develop into a larger mushroom.
Pink Oyster mushroom pins forming

As the pins grow, you will be able to differentiate between the cap/pileus of the mushroom and the stem/stipe of the mushroom. If the stems look very long and the caps don’t grow at the same speed or faster than the stem, your mushrooms need more fresh air. Cut slits into the humidity bag to allow small amounts of fresh air into the humidity bag.

Step 6: Harvesting

Knowing when to harvest your mushrooms is a quick skill to learn. It is very tempting to let your mushrooms grow for longer than they should. We are big advocates for experimentation so if this is your first time growing and you simply want to see how big they can grow then by all means have some fun and try it out. Mushrooms will also produce a prolific amount of spores if they are left to grow for too long. People who are sensitive to spores or have respiratory conditions are at risk of irritation to their respiratory pathways while the mushroom is producing spores.

If you want to harvest your mushrooms at their prime for cooking and before they release their spores then follow the steps below. 

  • Look at the caps: As pink oyster mushrooms grow, their caps will slowly unroll from the stem outwards. As the caps unfurl, the shape of the cap will change from a convex shape to a concave shape. This change in shape exposes more of the gills to the air, readying the mushroom for spore release. Once the cap is completely unfurled, the mushroom will release spores into the air. You will want to harvest the mushroom before the cap completely uncurls.
  • Smell: As the mushroom ages, the smell will change and develop into a more pungent ammonia-like smell. Harvest the mushrooms before the smell intensifies.
When the edges of your mushrooms look like the images below, you are ready to harvest. Gently grab the base of the mushroom and twist the mushroom while pulling it away from the kit. Pink oysters can have very firm stem bases, connecting to the substrate, and the firmness of the stem can sometimes be indicative of its age. If the stem is very firm, you can use a knife to cut through the base of the mushroom cluster, close to the substrate. 
Pink oyster mushroom close up

Can I get more harvests from my kit?

Once you’ve harvested your mushrooms, you’ll be able to get a second harvest or “flush” of mushrooms. Mushrooms can continue to grow as long as they have all of the requirements for growth such as: water and nutrition. The Myterra Labs Easy Mushroom Grow Kit has more than enough of both to sustain your mushrooms for a second round of mushrooms to form. Here’s what you need to do:

  • Tape over the hole that you cut in the kit. You want to avoid leaving any air gaps between the bag and the tape. If there is a gap between the tape and the bag, the mushrooms will find it and your next harvest will be a lot smaller and you will have a tiny mushroom form in the gap.
  • On the opposite side of the bag, cut another X into the bag.
  • Mist the inside of the humidity bag and place it over the kit.

 It’s as simple as that. Wait for 1-2 weeks to see fully mature  mushrooms before harvesting.

Cooking and Storing Your Mushrooms

Pink Oyster chopping Block

Well done! You’ve successfully grown your own mushrooms. The options for what to do next are endless. 

Cooking: There are numerous ways to cook pink oyster mushrooms with an abundant number of recipes online. One of the most popular uses for oyster mushroom is as a vegan bacon substitute. Click Here to make oyster bacon.

Long term storage: If you grow multiple kits at once or if you’re going away for a week, you can dry your harvested mushrooms by slicing the mushrooms into strips. Mushrooms can be dried whole, but they take longer to dry. Airdry at 115F for 24-28 hours or until they are dry enough to snap apart. Store in an air-tight container for up to 6 months.

Related Posts/Products

Why Should You Grow Pink Oyster?

Learn how to grow Pink Oyster mushrooms using the Myterra Labs Easy Mushroom Grow Kit
Read More

What's next!

You are officially part of the mushroom growing community! Share your success on social media and follow us for more mushroom growing tips and tricks – there are so many mushrooms that you can test your new growing skills  on!

If you liked growing pink oyster mushrooms and want to expand your mushroom growing skills, we suggest growing White Oyster mushrooms. Click here to learn more. White oyster mushrooms are pearlescent and elegant with soft flesh. Although the pink and white oysters are both oyster mushrooms, their flavors and textures are very different. Our white oyster strain produces large clusters of mushrooms, providing a larger harvest than the pink oyster. The white oyster mushroom is easier to grow than the pink oysters because white oysters can tolerate a larger range of environmental conditions.

You might also enjoy

Your wishlist is currently empty!

Wishlist
Scroll to Top
[aelia_currency_selector_widget widget_type="dropdown_flags"]